
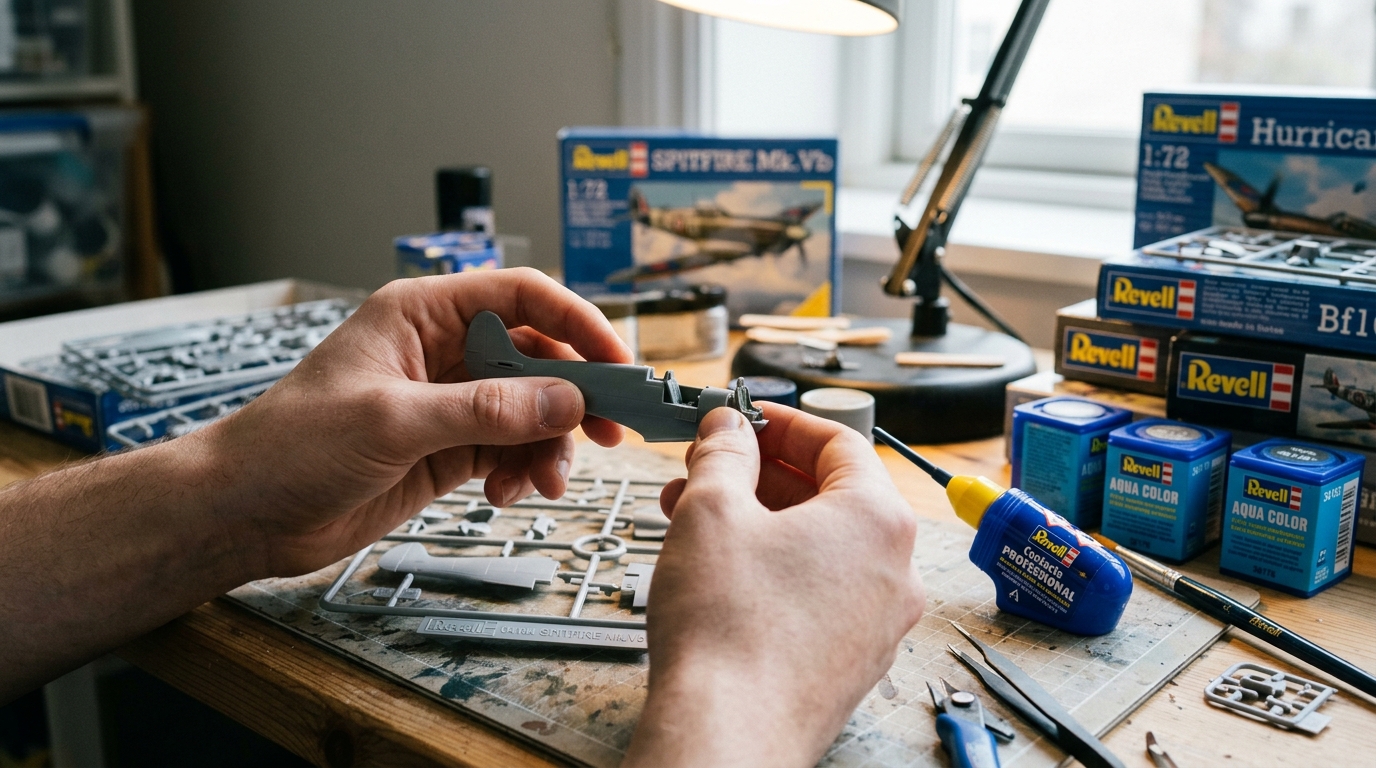
A box full of plastic parts, a detailed construction plan and the anticipation of the finished model on the desk. Getting started with plastic model building with Revell kits requires craftsmanship and patience. But especially at the beginning, many people find themselves faced with a mountain of watering branches and ask themselves how they should approach this project in a structured manner.
We often experience that newcomers start out highly motivated, but then choose a model that is too complex or despair of the basic painting techniques. The key to a successful first kit is not expensive special tools, but rather proper preparation and a realistic assessment of your own abilities.
In this guide, we will show you, based on our many years of practice, how you can successfully master your first project. You will find out what you need to pay attention to when making your selection, which steps are really important and how to avoid typical stumbling blocks right from the start.
How much time should beginners plan for their first Revell model?
The construction time for a first Revell model is a variable period of time, ranging from just under 30 minutes for simple plug-in kits to 15 hours for classic adhesive models. Realistic scheduling saves you from frustration and ensures that the fun of crafting remains in the foreground.
For your very first project, we recommend that you divide the work into manageable stages of around 60 to 90 minutes. If you choose a pre-painted model, you will save a huge amount of time and still achieve a high level of detail. According to current experience reports on Testbericht.de (2025), these variants are particularly popular with airplanes and cars, as they give newcomers a direct experience of success.
Plan about 20 percent of the total time for just removing and cleaning the parts. Gluing and aligning takes another 30 percent. If you choose an unpainted model, painting and applying the decals will take the most time, around 50 percent, as you have to pay attention to the drying times of the paint.
Which Revell model is best for absolute beginners?
A Revell beginner model contains fewer than 50 dimensionally stable components and does not require any special painting processes. We strongly advise you not to start straight away with a huge sailing ship or a highly detailed submarine with over 6,000 parts.
Instead, go for compact vehicles or aircraft in 1:72 or 1:32 scale. These models offer components of a pleasant size that you can easily grip and process. Our licensed models from the Star Wars or Harry Potter areas are often designed specifically for beginners and guarantee quick construction progress thanks to clever plug-in systems.
The Revell Level System Explained
The Revell level system consists of five defined difficulty levels that precisely categorize all kits according to the number of parts, the need for glue and the amount of painting required. This well thought-out system makes your selection much easier.
Level 1 and Level 2 are ideal for an absolute start. Level 1 includes simple plug-in kits without gluing or painting, which are often suitable for children aged 8 and over. Level 2 introduces you to gluing and painting, but keeps the number of parts at a manageable level of around 30 to 50 pieces. Medium-heavy kits from level 3 are aimed at hobbyists aged 10 to 12 and require significantly more fine motor skills. You should save levels 4 and 5 for later when you have gained enough experience.
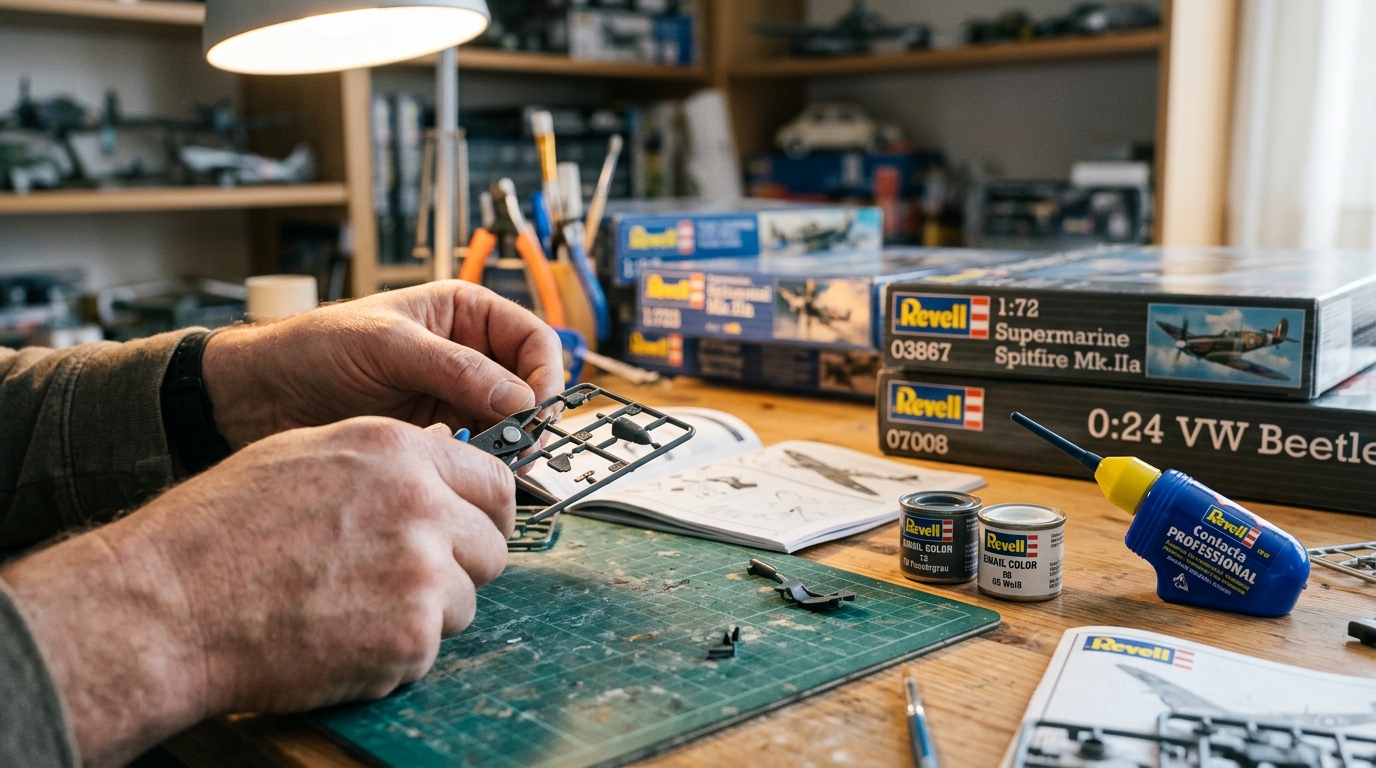
The contents of a classic Revell kit
A classic Revell model kit consists of several molded parts with plastic parts, transparent components for windows, a sheet of water-soluble decals and detailed building instructions. When you open the box, first check whether all the molded parts are completely sealed and undamaged.
The construction instructions are your most important tool. It shows you in logical steps which parts belong together and in which order. Each component has its own number on the casting branch, which you can find in the instructions. If you ever misplace the paper instructions, you can easily find them in ours at any time Download Center access digitally.
What tools and preparations do newbies absolutely need?
Structured work preparation enables smooth assembly and prevents the frustrating loss of tiny, delicate components. You don't need an expensive professional workshop to get started, but a few basic things will make your work a lot easier.
In our practice, it has proven useful to have all the required materials ready before you start. Always only work on the construction step that is currently shown in the instructions. Never remove all the parts from the frame at the same time, otherwise you will no longer be able to assign them. A tidy space is the best guarantee for a clean model.
The optimal workplace at the kitchen table
An ergonomic model making workplace consists of a well-lit, flat work surface, a cut-resistant craft mat and sufficient room ventilation. A good desk lamp is extremely important so that you can clearly see fine details and molding lines on the plastic parts.
Be sure to protect your table from scratches and glue stains with a cutting mat or thick cardboard. Since you often have to hold small parts while working, we recommend choosing a light-colored surface. If a tiny, gray component falls out of your hand, you can find it again on a light background in seconds.
Essential tool for getting started
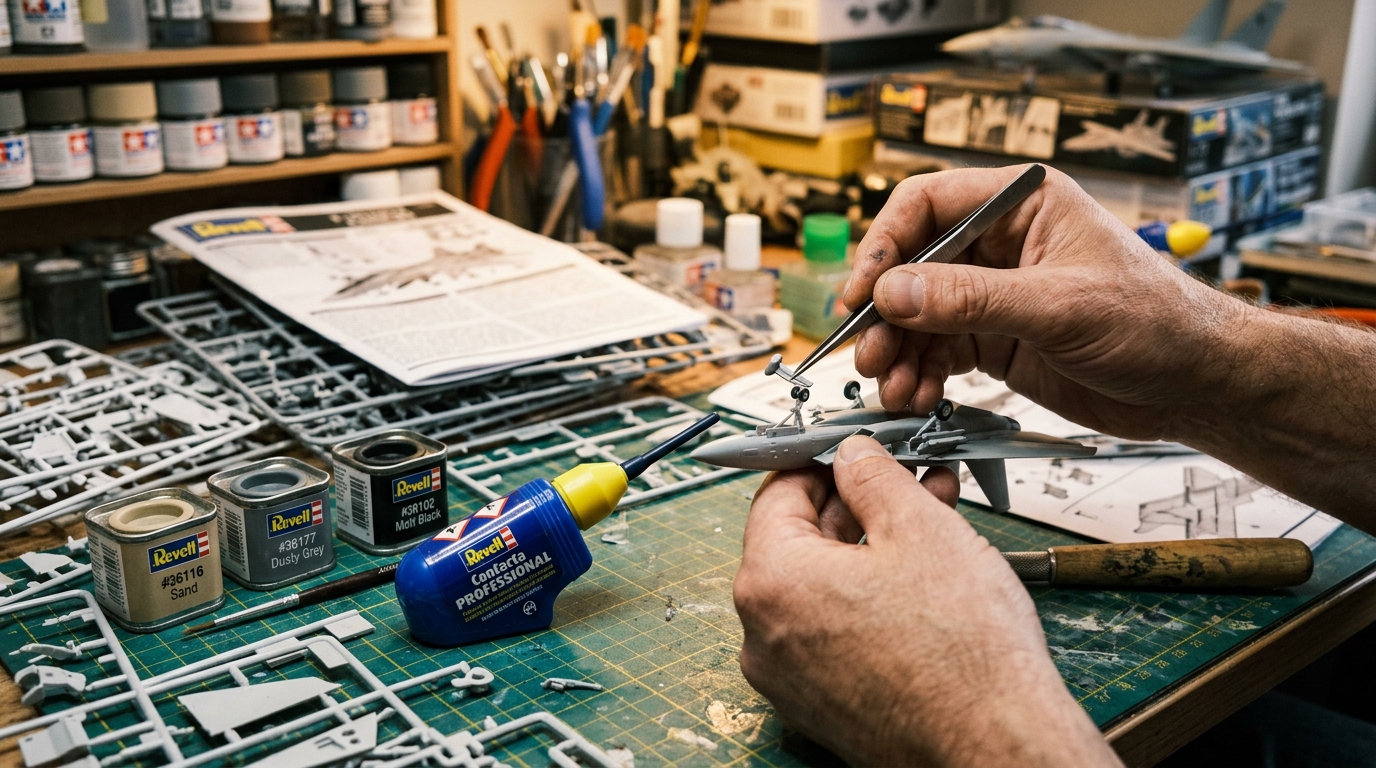
The essential basic equipment for plastic model making consists of three main components: a sharp side cutter, a fine file and the appropriate plastic glue. Please do not try to simply break the components out of the frame, as this will leave unsightly holes in the plastic.
Use the side cutters to cleanly separate the parts from the casting branch. Carefully sand the remaining residue smooth with a model building file or fine sandpaper. We recommend our Revell Contacta Professional adhesive for connecting the parts. It has a fine metal cannula with which you can dose the adhesive precisely and extremely economically.
Clean plastic parts properly
Washing the plastic moldings beforehand with lukewarm detergent water allows paints and adhesives to adhere to the surface up to 50 percent better. This simple step is overlooked by almost all beginners, but is extremely effective.
When producing the kits in our injection molding machines, we use a fine release agent so that the frames can be easily removed from the mold. An invisible film of this agent often remains on the plastic. Simply place the complete frames in soapy water for 10 minutes, rinse them clean, and allow them to air dry completely before you begin construction.
How do you achieve the perfect painting without annoying brush strokes?
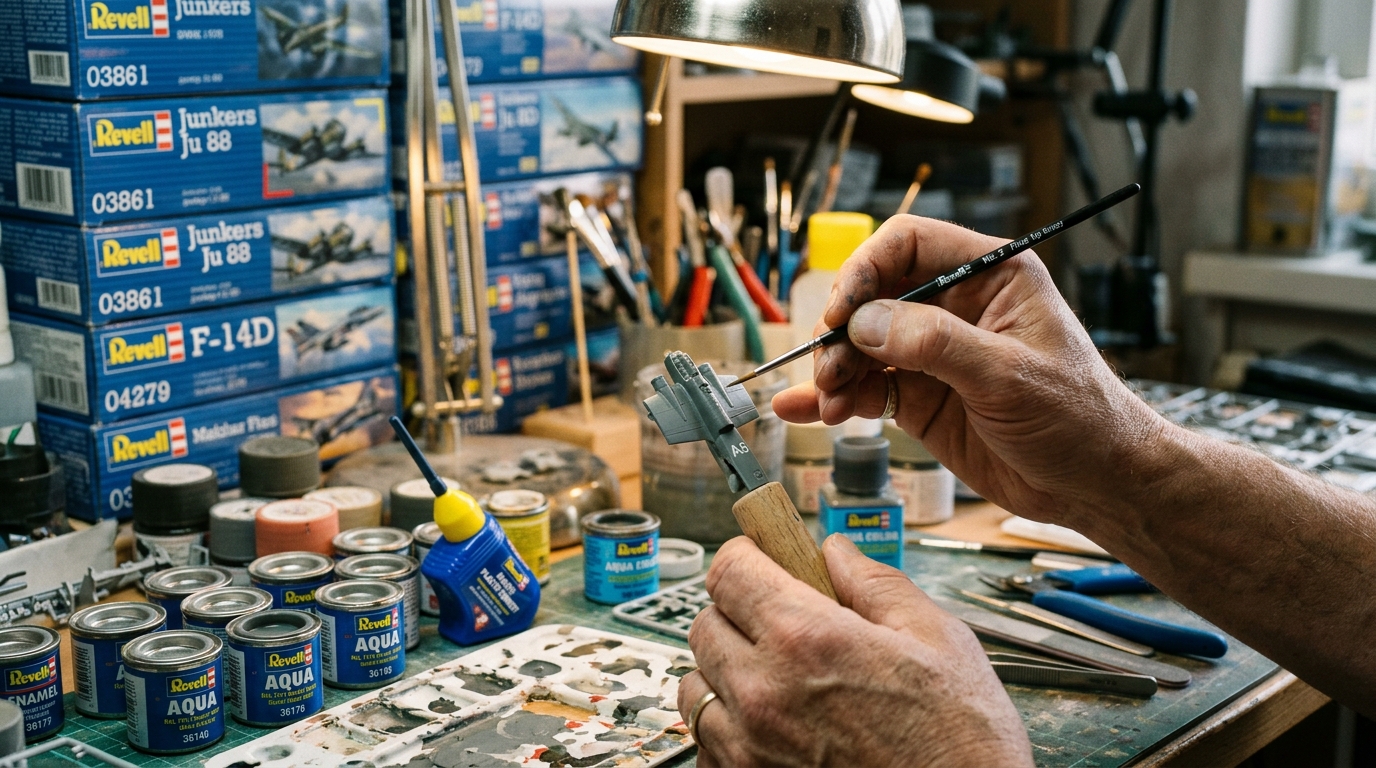
Applying paint layer by layer creates a flawlessly smooth surface that leaves no annoying brush strokes visible on the finished plastic model. Painting is the biggest challenge for many newbies, but it can be easily mastered with the right technique.
The most common mistake is to apply the paint undiluted and far too thick to cover the model in a single pass. This hides fine details such as rivets or sheet metal joints. Dilute your paint slightly until it is the consistency of milk. Then apply two or three very thin layers. Allow each layer to dry thoroughly before applying the next.
Revell Aqua Color compared to Email Color
In contrast to solvent-based Email Color offers colors Revell Aqua Color a water-based composition that is almost odor-free and dries completely in just 2 to 3 hours. This color system is by far the best choice for beginners.
You can easily dilute the Aqua Color colors with tap water. You can also easily wash your brushes under the tap after work without the need for aggressive thinners. Another advantage: the paint is dust dry after just one hour, so you can continue building your model quickly. In comparison, Email Color paints often take over 12 hours to dry.
What typical beginner mistakes ruin the first kit?
Systematic avoidance of standard errors enables significantly cleaner results and protects you from frustration on your very first project. One of the biggest mistakes is ignoring the symbols in the building instructions.
Pay close attention to little notices like “Do not stick” or “Use optionally.” Another classic is the excessive use of glue. Plastic glue easily welds the material. If you use too much, the component will melt or the glue will ooze out unsightly at the seams. Use the cannula very sparingly.
If, despite all your caution, an important component breaks or gets lost, it's not the end of the world. About ours Revell customer service You can request replacement parts for current kits so that you can successfully complete your project.
Conclusion & Next Steps
Getting started with plastic model making is a creative learning process that delivers immediate and visible success with a Level 1 or Level 2 kit. If you take enough time, study the construction instructions carefully and follow the basic rules of painting, you will be proud of your first, self-built model in the end.
Don't be discouraged if the first painting doesn't look perfect or if a glue seam remains visible. With each new kit you develop your motor skills and learn new techniques. The most important thing is the joy of craftsmanship.
Would you like to start straight away with your first project? Discover the right entry-level models and the right accessories for your perfect start into this great hobby in our online shop.
Frequently Asked Questions (FAQ)
At what age does Revell model building really make sense for children?
It's easy to get started with our Level 1 plug-in kits for ages 8 and up. These models do not require glue and train spatial thinking in a playful way. For adhesive models from level 3 onwards, we recommend an age of at least 10 to 12 years, as handling side cutters and plastic glue requires more fine motor skills and patience.
What is the exact difference between Revell Aqua Color and Email Color?
Aqua Color are environmentally friendly, water-based acrylic paints that have a low odor, dry quickly and can be diluted with water. Email Color are classic solvent-based synthetic resin colors. They dry much more slowly, but often offer a slightly smoother finish on large areas. For beginners we always recommend the uncomplicated Aqua Color colors.
Which tools do I absolutely need for successful construction?
For your first model you only need three things: a model making side cutter to cleanly cut off the parts, a fine file or sandpaper to smooth the edges and our Contacta Professional plastic glue. Brushes in two different strengths (sizes 2 and 4) round off your basic equipment for painting.
Why should you wash plastic parts before painting?
Washing removes invisible residues of release agents used in the injection molds during production. If you don't wash off this layer of grease with a little detergent water, the paint may not stick properly later or may peel off again when the masking tape is removed.
How do I read and understand the symbols in the construction instructions correctly?
On the first pages of every Revell building manual you will find a legend that explains all the symbols in detail. The most important are the crossed-out drop symbol (“Do not stick”), the clock symbol (“Let dry”) and the question mark (“Use optionally”). Check these symbols carefully before each individual construction step.

